
Windbreak panel wall design and installation steps
Windbreak panel wall design and installation steps
MOQ : piece
Lead Time : Days
Seller Support : Trade Authenticity Guaranteed & Accepting
Payment : L/C,T/T,Western Union, Money Gram, Credit Card, Paypal
Product details
Supply Ability
- Warranty(Year):1 Year
Product Specifications
Product Description
Windbreak panel wall Design:
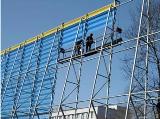
Windbreak wall is composed of three parts: reinforced concrete foundation, steel frame and ground windbreak panel.
According to the local meteorological data and the surrounding residential areas, industrial and working protection requirements, while ensuring that do not affect the loading and unloading operations, we can selectively set stockyard windbreak and dust wall. This wind break wall also can be set around device to protect it.
Tip: Must stay out door holes to facilitate vehicle access.
Windbreak wall Installation Instructions - four steps
- Windbreak panel wall underground base: pouring the foundation onsite or using precast concrete blocks underground.
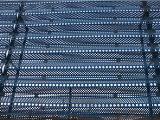
- windbreak wall supporting structure: engineering design parameters according to the wind velocity. The steel support bracket provides sufficient strength to windbreak panels, which can be withstand strong winds destroyed, followed by consideration of the overall appearance. Supporting structure body is made from steel tube, reinforced concrete pillars used as wind break wall bracket.
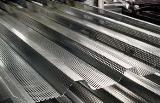
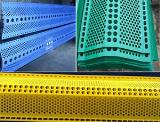
- Windbreak panels installation: service life of 15 to 20 years. Ambient temperature: -40 °C to +80 °C, connected by screws and fixed plate. The specific size, bending, drilling rate should be designed according to the actual situation.
- Retaining brick wall: To prevent slime water spills after rain and snow, the lower part of the windshield can be set 1.2-1.5 meter retaining brick wall.

Windbreak Wall Installation -1

Windbreak Wall Installation -2

Windbreak Wall Installation -3

Windbreak Wall Installation -4

Windbreak Wall Installation -5

Windbreak Wall Installation -6
You May Like

- Free Member
- Trade Assurance
Business Type : Manufacturer
Company Location:


